
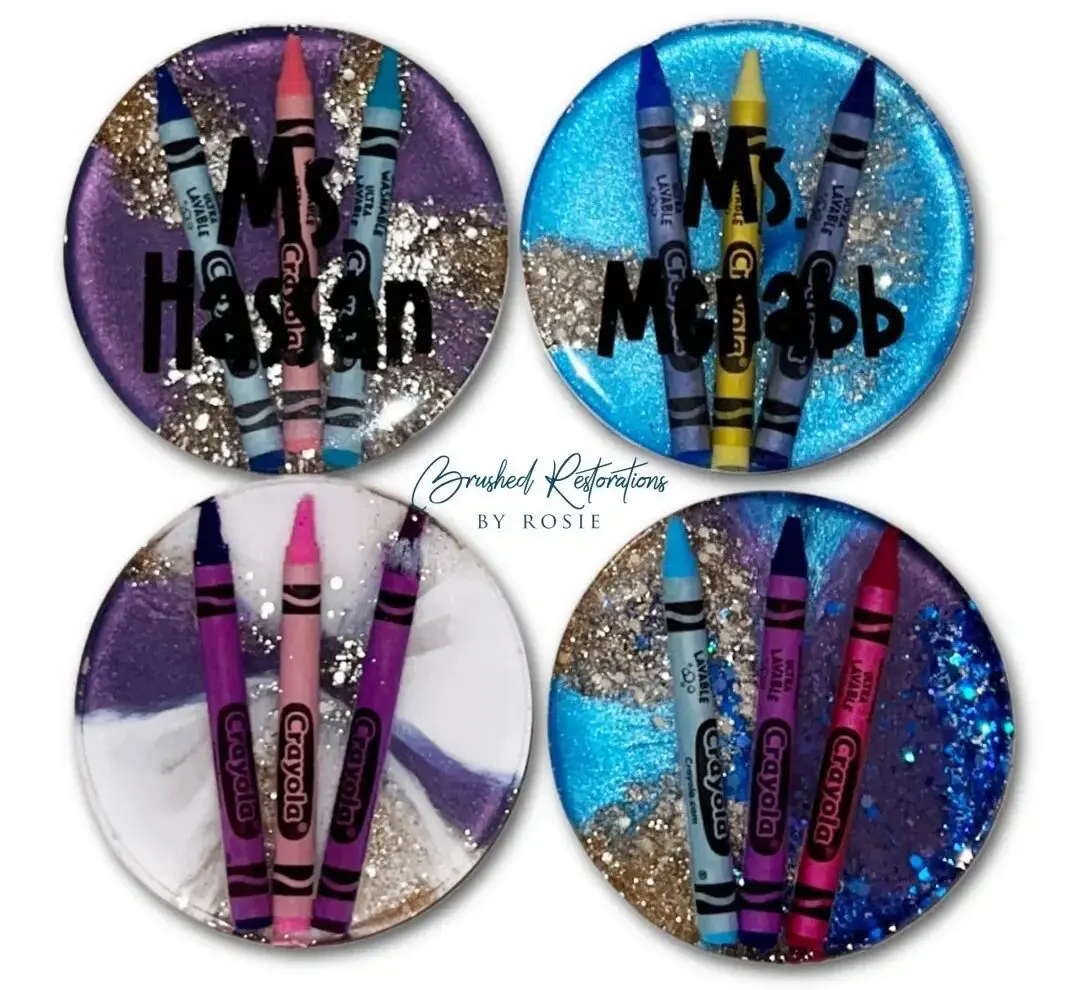
How to Make Resin DIY Crayon Coasters
Welcome to our DIY crafting corner, where we explore the wonderful world of resin crafts! Today, we’re diving into a fun and colorful project. Looking for the perfect teacher appreciation gift idea? Look no further, resin DIY crayon coasters are the perfect DIY craft!
Resin crafts have been gaining popularity for their versatility and endless possibilities, and creating resin crayon coasters is a fantastic way to unleash your artistic side. Whether you’re a seasoned crafter or just starting out, this project is sure to spark your creativity and leave you with beautiful and functional coasters that will impress. Consider enrolling in my Resin Basics Course if you seek to enhance your comprehension of working with resin. In this course, I cover all the essential principles that will establish a solid groundwork for you.
In this blog post, we’ll guide you through the step-by-step process of creating your own resin crayon coasters, from choosing the right materials to adding your personal touch with different colors and designs. Get ready to embark on a crafting adventure that will not only result in stunning coasters but also provide you with a therapeutic and rewarding experience.
So, grab your supplies, put on your crafting hat, and let’s jump into the colorful and exciting world of DIY resin crayon coasters. Let’s get creative!
Resin DIY Crayon Coasters
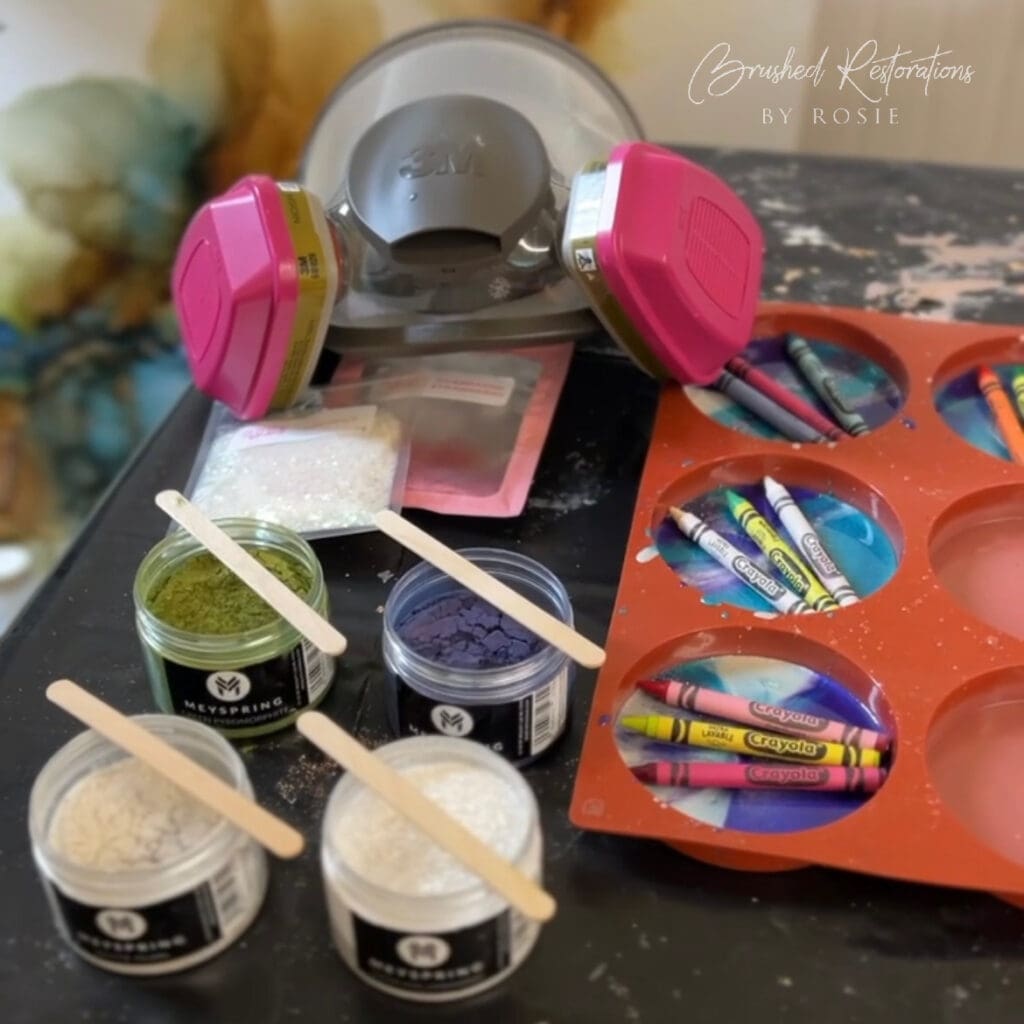
Supplies For Your DIY Craft:
Before diving into the creative process of making your resin DIY crayon coasters, let’s ensure you have all the necessary supplies on hand for this DIY project.
- Clear epoxy Resin for casting.
- Silicone mold for coasters (minimum 9cm in diameter to fit regular crayons)
- Crayons
- Fillers (optional): crayons, paperclips, small erasers, pencil sharpeners, thumbtacks, glitter, small beads, etc.
- Colorants to add to your resin such as Pigment Powders or pigment pastes. Read more about his topic in my blog post, Adding Color To Your Resin Art: A Beginners Guide.
- Small, transparent disposable cups
- Stirring sticks
- Gloves for mixing the resin
- Heat gun
- PPE Safety Gear
Gather these supplies to set yourself up for a successful crafting session creating your unique resin crayon coasters.
Step By Step Guide Creating Resin DIY Crayon Coaster
1: Preparing the Base
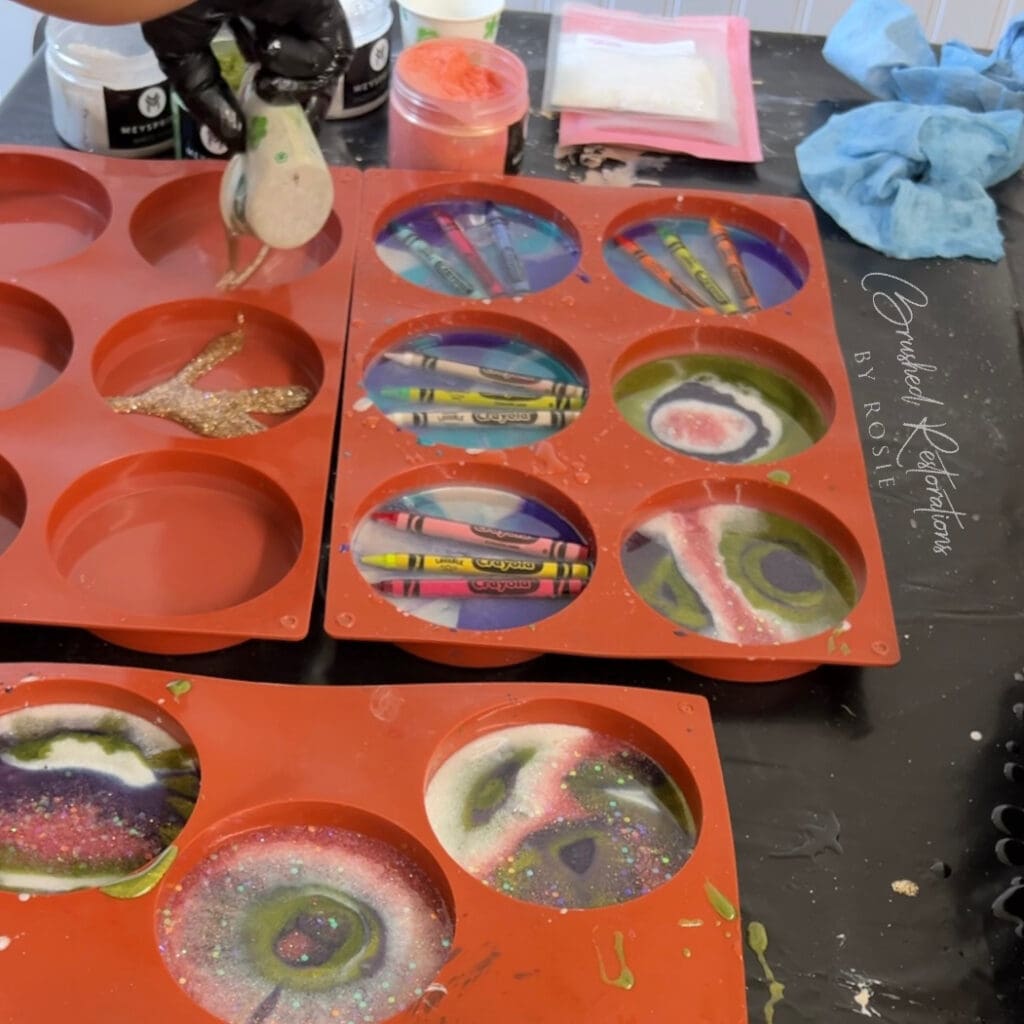
- Mix the Resin: Begin by preparing your epoxy resin according to the manufacturer’s instructions. Ensure you wear appropriate safety gear during this process.
- Add Color or Glitter: Integrate your chosen colorant or glitter into the mixed resin for a vibrant or sparkling base layer.
- Fill the Mold: Pour the colored or glittered resin into your silicone molds, filling up to about one-third of their depth.
- Cure the Resin: Allow the resin to cure for 24 hours in a dust-free environment.

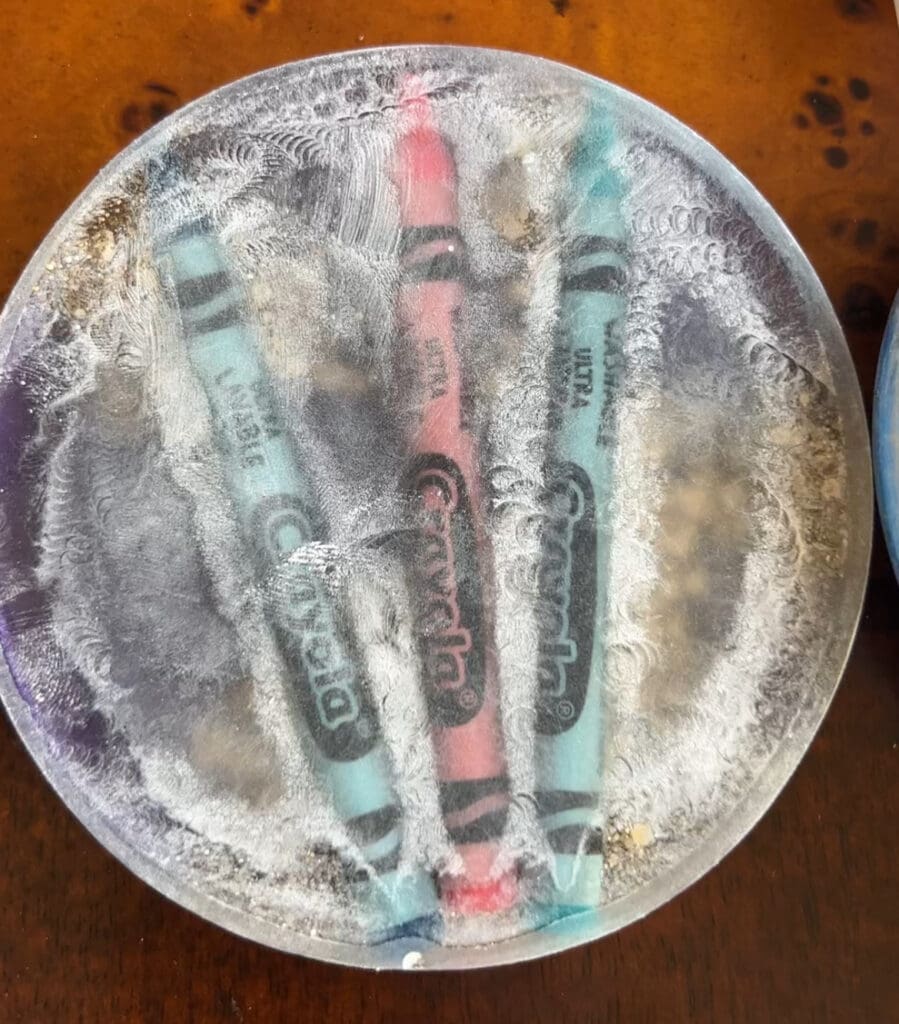
2: Embedding Decorative Items
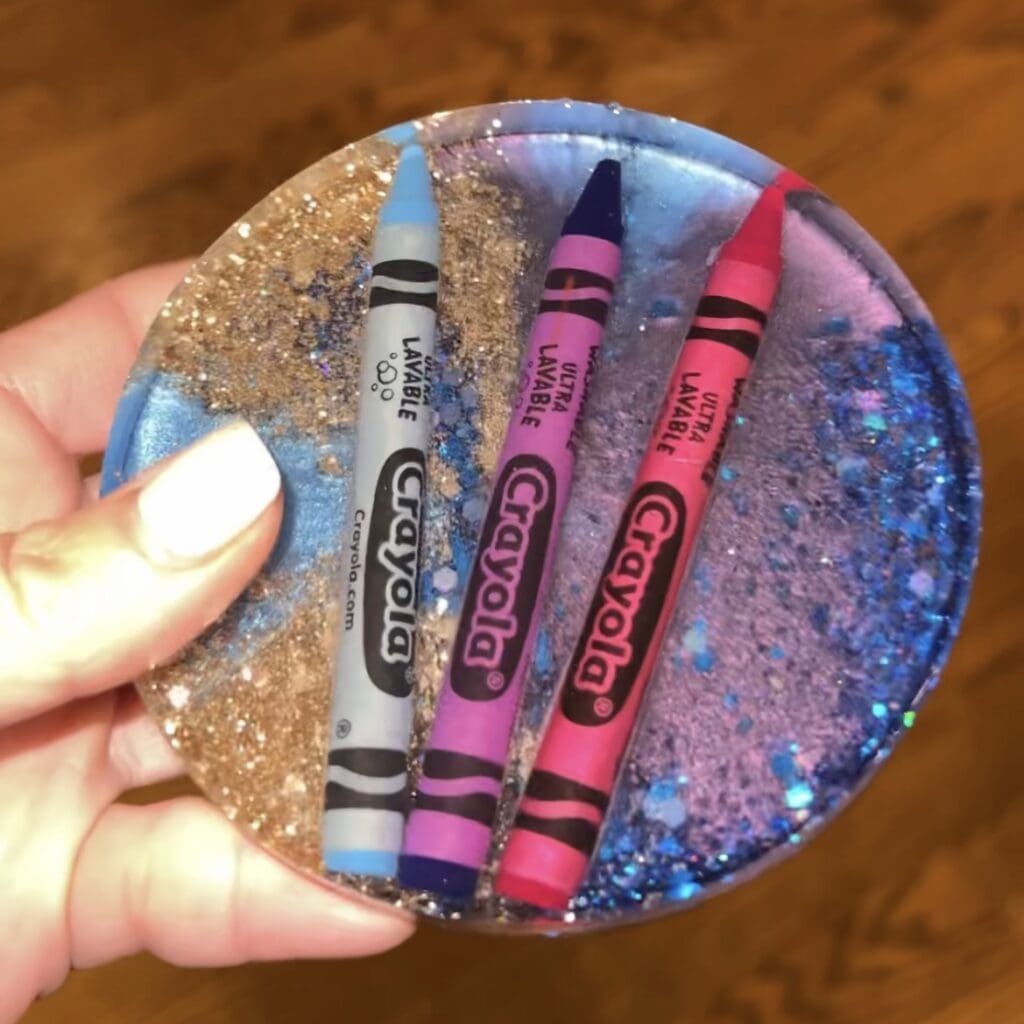
- Position the Items: After the base layer has cured, place the decorative items like crayons or pushpins into the mold. Arrange them creatively to reflect the subjects or interests of the intended recipient.
- Secure with Resin: Drip a small amount of resin over the items to fix them into place. Avoid moving the items as you pour.
- Second Cure: Allow this layer to cure for another 24 hours to ensure the items are firmly embedded.
3: Adding Additional Layers
- Scuff Sanding: Once the second layer is cured, lightly sand the surface with sandpaper. This scuffing helps the next layer of resin adhere better.
- Apply Another Layer: If the items are not fully covered, mix another batch of resin and gently pour it over the existing layer, taking care not to overfill if not using deep-pour resin.
- Cure Again: Allow this layer to cure as per the resin’s curing time, typically another 24 hours.
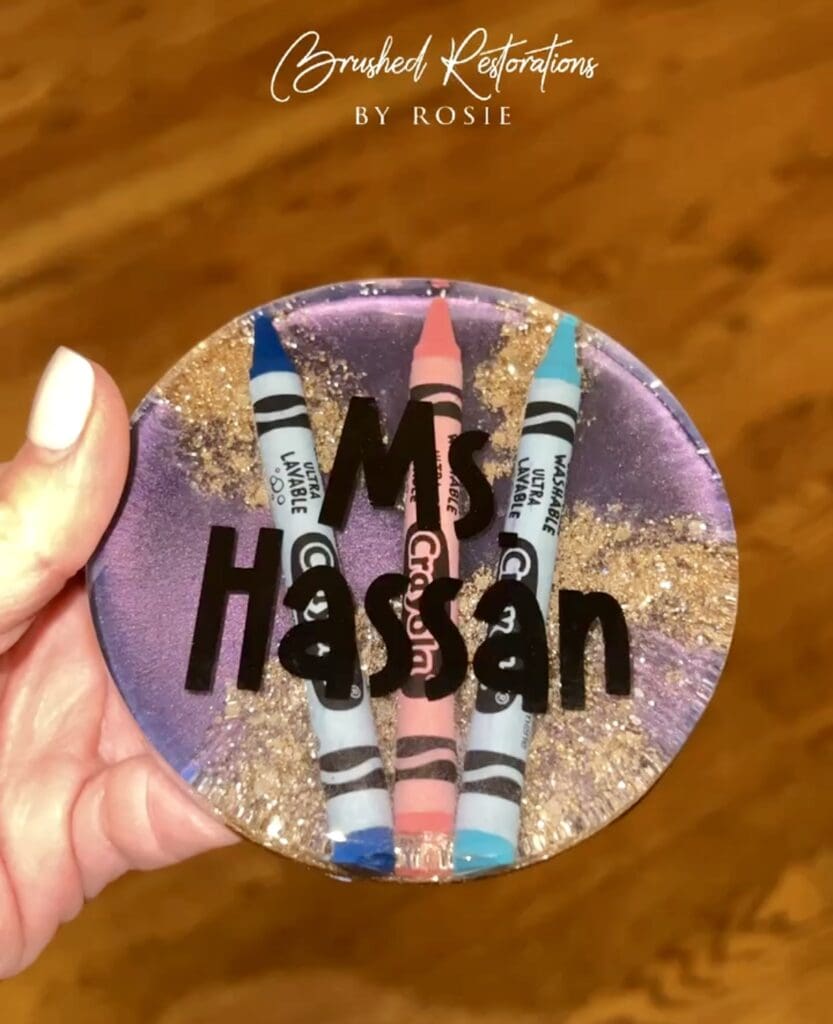
4: Personalization
- Prepare Names/Designs: Use a Cricut printer to create personalized names or designs that will be added to the coasters.
- Apply the Designs: Carefully place the cut-out designs onto the partially cured resin surface. Ensure each piece is correctly aligned and press gently to adhere it to the resin.
- Seal the Design: Pour a final layer of resin over the entire surface to encase the designs, ensuring they are completely covered and protected. Video below explains how to do your top coat on resin coasters.
5: Final Curing
- Final Cure: Allow the coasters to cure for 24 hours or according to the resin’s specified curing time. This final layer seals and protects the personalized designs.
- Check for Smoothness: Once fully cured, check each coaster for any sharp edges or bumps. Lightly sand any imperfections for a smooth, professional finish.
6: Finishing Touches
- Inspect Your Work: Ensure that each coaster is flawless and the resin has set clear and without bubbles.
- Clean Up: Wipe the coasters with a soft cloth to remove any dust particles. If necessary, wash with mild soapy water and dry thoroughly.
7: Packaging and Presentation
- Prepare for Gifting: Attach a small thank you card or tag to each coaster set, personalizing it with a message of appreciation for the teacher.
- Gift Wrapping: Optionally, wrap the coasters in attractive packaging, ready to be gifted to the deserving educators.
Resin DIY Crayon Coasters The Perfect Gift
These resin coasters not only serve as practical desk accessories but also as heartfelt reminders of appreciation. Each step in this DIY project offers a chance to inject creativity and personal touches, making the coasters a truly special gift for any teacher. Enjoy the process of creating, and know that your effort will brighten a teacher’s day.
This guide aims to provide a clear and enjoyable experience in crafting personalized resin coasters, perfect for teacher appreciation gifts or even as a project to undertake with students. Enjoy crafting and giving!
More Resin Crafts: The Perfect DIY Gift
Teacher Appreciation Gift Ideas
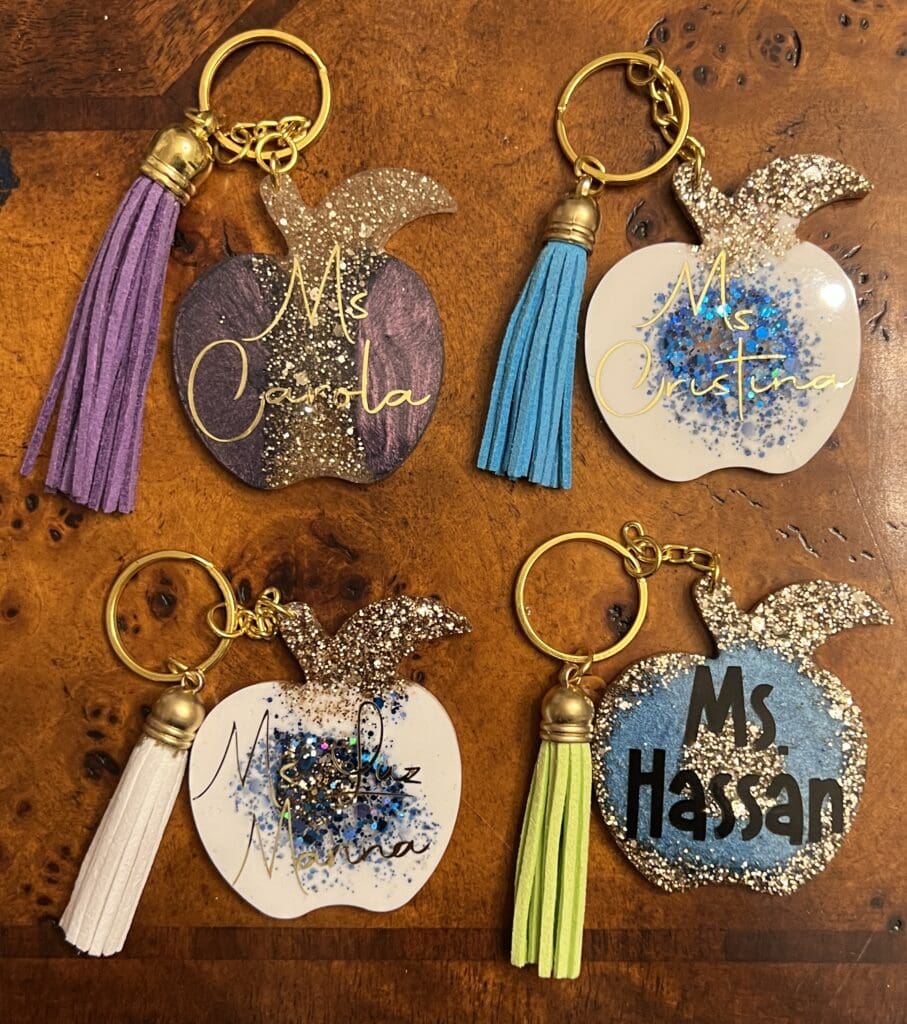
When it comes to showing appreciation for teachers, handmade gifts hold a special place in their hearts. Expand your crafting horizons beyond resin crayon coasters and explore a world of possibilities with resin crafts that teachers will adore. From resin keychains to personalized tumblers, there are endless opportunities to create unique and thoughtful gifts.
- Resin Keychains – Craft custom resin keychains featuring initials, inspirational words, or fun shapes that resonate with your favorite teachers. These keychains are not only practical but also serve as a constant reminder of your appreciation.
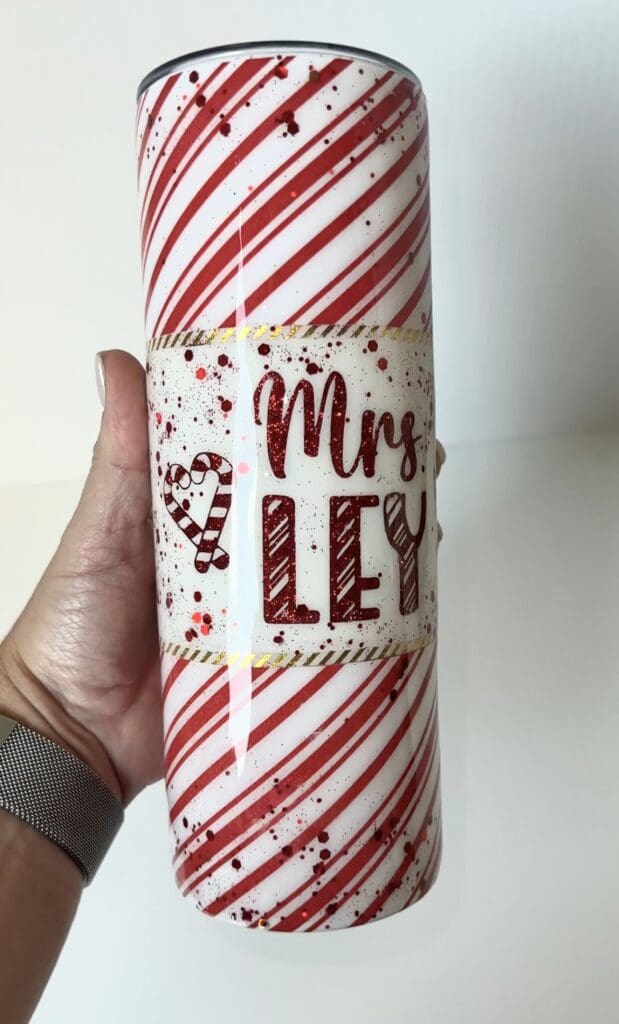
- Personalized Tumblers– Add a personal touch to your gifts by designing resin-coated tumblers with the teacher’s name, favorite colors, or inspiring quotes. These one-of-a-kind tumblers are both stylish and functional, making them a perfect gift for any occasion.
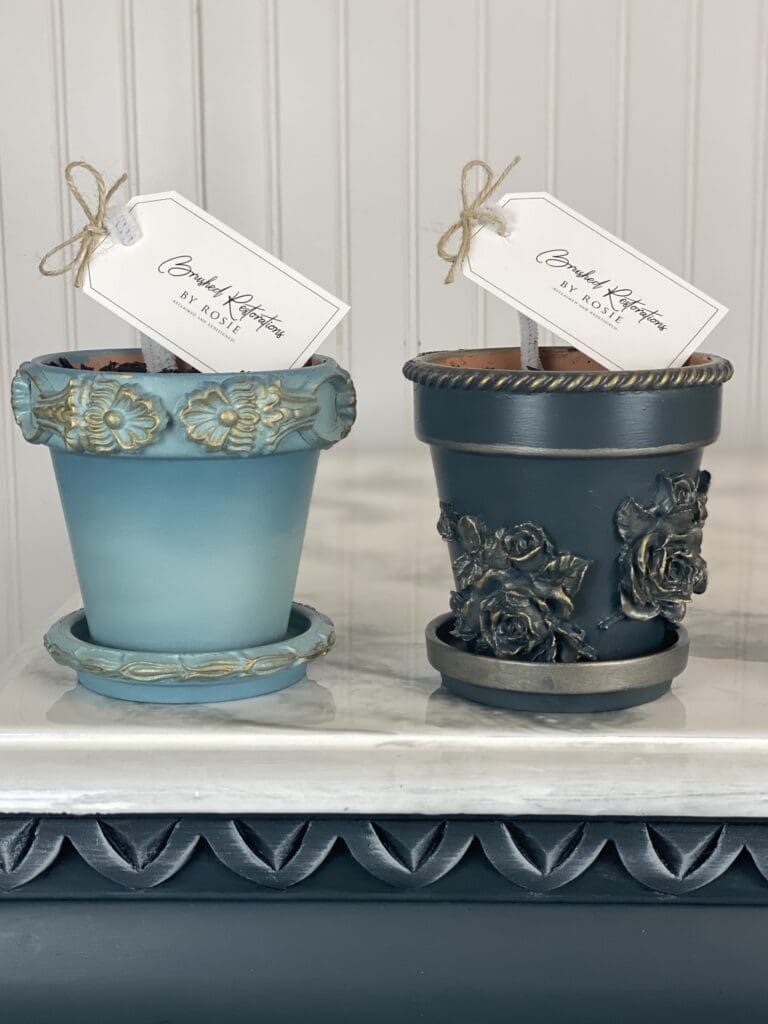
- DIY Flower Pot- Get creative with resin by decorating a flower pot with vibrant colors, unique patterns, or even embedding small trinkets. A customized resin-coated flower pot adds a touch of beauty to any teacher’s desk or home, bringing a little piece of nature indoors. When we gave them to our teachers we added some soil and planted seeds. We wrote a little note that said, “Thank you for planting seeds of knowledge and nurturing them to grow. Your dedication helps beautiful minds blossom!”
Whether you choose to craft resin keychains, personalized tumblers, or a decorative flower pot, each handmade gift carries a heartfelt message of gratitude and admiration for the hard work and dedication teachers put into shaping young minds. Let your creativity flow and delight your teachers with these charming resin crafts that they will cherish for years to come.
Express your appreciation with a handmade gift that is both practical and meaningful. Your teachers will surely cherish the effort and creativity you put into making these resin DIY crayon coasters.
Disclaimer that some products may be affiliate links and earn commission

Hi There, I’m Rosie
I’m a mixed media artist who turned my passion for resin art into a thriving business, Brushed Restorations by Rosie. I love luxury, bold creativity, and helping other artists transform their hobbies into successful businesses. Between creating custom art pieces and teaching online courses, you’ll find me juggling life with my four kids and chasing new ideas to inspire creators like you!
My mission? To empower artists to grow their skills, build their brands, and make their art dreams a reality.

ROSIE’S FAVORITE
CREATIVE
MUST-HAVES


